The 411 on soldering electrical components
Soldering is an important part of working with electronic components. In order for the necessary components to be firmly connected and for a current to flow smoothly, there is some essential equipment needed and some important techniques to master.
Author: Holger Engelbrecht (pictured), Product Manager, reichelt elektronik
1. Ensure your workspace is clean
The first step in any case is to create a clean, dust-free work environment.
2. Clean your soldering iron
Make sure that the soldering tip and the item you are going to solder are completely clean and that there is no residue on them. If any excess material is found on the component, either wipe it off with a metal sponge or gently grind it with abrasive paper and then thoroughly clean it with compressed Air 67 or alcohol.

3.Twist your wires together – use a vice to help
The cable ends that need to be connected should first be stripped and twisted into one another. Place a small vice in position so that the part to be soldered is held securely and does not slip during heating or cooling.
4.Ensure your workspace is ventilated
It is best to ensure suitable ventilation for your workplace. The fluid contains acids which upon heating can cause harmful vapours and should not be inhaled. Extraction units with integrated filters are available in a range of sizes to provide optimum protection against toxins in the air.
5.Soldering
Firstly, touch the solder to the iron tip and then place it onto the wire where you would like to make a join. Repeat as much as necessary until the joint is secure and then let it cool.
For thin cables, it is sufficient to apply a little solder to the soldering tip and hold it to the soldering point. The strands will be sucked in together by capillary forces.
In the case of thicker cables, the larger amount of copper leads to cooling of the soldered joint – do not hold the soldering tip any longer. Since copper is very conductive, the insulation could melt – use a larger amount of solder to avoid this.
Check out a step by step on how to solder in the video below.
6.Check over your work
Are there any defective soldered joints, bent IC legs or even incorrectly used components?
If all looks good here, a test should then be carried out with a multimeter. This allows you to measure the throughput, voltage, current consumption and resistance of each individual connection, thus identifying short circuits and disruptions.
If you have used too much tin or parts are wrongly soldered, a de-soldering process is necessary. Depending on the equipment you have available, either a brazing wire or a de-soldering station can be used.
If a wire is chosen, place it on the spot to be soldered and heat with the soldering tip until the superfluous tin is sucked in as described above by capillary forces. Soldering / desoldering stations make this much easier and they also include a desoldering iron. Excess material is sucked off directly afterwards. When vacuuming, be sure to work at a steep angle so that no tin residues are distributed.
Top tips:
Using the right tool
Important tools include a stripping tool, a high-quality tweezer set, a side cutter, a circuit board and a dry sponge for cleaning.
It’s also a good idea to use a soldering station as it can keep an exact temperature pre-setting, ensuring it doesn‘t change during the whole soldering process.
In order to be able to solder very small parts precisely, a soldering aid with a magnifying glass can help you out a lot.
Using the right solder
Solder is partly made up from lead, which has a lower melting temperature and better flux properties than other metals, and therefore can sometimes be suitable for hobbyists. However, it might be a little bit harder to use than a non-leaded solder and can potentially produce hazardous fumes if not correctly handled. Alternate solder options should be considered for health reasons.
The optimal temperature
Did you know there is a difference between soft and hard soldering? Soft solder melts at less than 450°C, whereas the liquid temperature of Hartoten is between 450-900°C. Since electronic components are very sensitive, only soft soldering can be used here.
The temperature you should work with depends on the components you are using. Check the melting temperature of your soldering tin, as well as the working temperature of your flux. It should in any case be above the two minimum values, but it must not exceed the maximum operating temperature of the flux, as this will then evaporate.
The soldering temperature for electronic components is 300-320°C. When fine wires are used, a temperature of less than 300°C and a thin soldering tip is used.
If the temperature is too low, the solder will not be shiny and will be drop-shaped, resulting in a poor connection that won’t work. In this case, you should adjust the temperature, and then continue to work.
Beware of electrostatic discharge (ESD)
Many electronic components are very sensitive and they can be damaged by voltage surges, even at low currents or voltages. This can lead to a failure of the entire device later on.
In order to prevent such currents, make sure you have the right kit for your needs. For example: an ESD working mat, ESD gloves, ESD brushes and a wrist strap with an ESD lead-out cable, are handy to have.
If you are using a soldering station, you should regularly check the leakage voltage and the grounding resistance of the soldering tip to the power plug of the device.
Product Spotlight
APV1111GVY
Panasonic
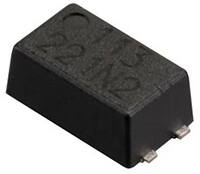
Panasonic PhotoMOS® Photovoltaic MOSFET High-Power Drivers
| SKU: | |
|---|---|
| Stock: | 3490 |
| Cost: | $3.95 |